How to Turn Holiday Greenery Dies into Summer Card Foliage
by Agnieszka Malyszek August 3, 2026

Key Takeaways
Look Beyond the Season: A winter mistletoe or holly die can easily pass as summer woodland branches or berries with the right color choices.
Shift the Color Palette: Replace traditional reds and deep greens with vibrant purples, mints, or pastel shades to instantly shift the seasonal mood.
Add Depth with Acrylic Markers: Use acrylic paint pens to add custom shading, highlights, and variation to plain die-cut cardstock.
Contrast Key Elements: Dark background cardstock (like navy or black) makes vibrant summer die cuts pop off the page.
Hello, everyone! Aga here, and today I'm sharing a simple handmade card that proves just how versatile your paper crafting supplies can truly be.
If you are anything like me, your craft space is probably full of specialized stamp sets, dies, and hot foil plates bought for specific holidays. But I love finding new, unexpected ways to use paper crafting products beyond their intended purpose! Today's project is all about stretching your crafting supplies so you can maximize your investment and get continuous value out of every single die set sitting in your stash—no matter what time of year it is.

Why You Should Use Holiday Dies for Year-Round Crafting
It is so easy to fall into the habit of tucking away our Christmas and holiday supplies as soon as the winter season ends. However, many botanical dies are far more adaptable than their names suggest!
Although the Festive Greenery Die Set was originally designed with winter and holiday cardmaking in mind, I wanted to show just how versatile seasonal dies can be throughout the entire year.
Instead of seeing classic Christmas mistletoe when looking at these shapes, I saw delicate, organic woodland branches dotted with tiny summer berries. By choosing a fresh purple color palette for the berries and pairing it with lush, vibrant green branches, I transformed what could have been a winter-focused design into a fresh, nature-inspired arrangement that feels lively and perfect for warm-weather cards.

How to Incorporate Festive Greenery into a Summer Card
Transforming seasonal die cuts into year-round elements is much easier than you might think! It all comes down to color choices, subtle shading techniques, and smart framing. Here is a step-by-step breakdown of how I brought this summer card together:

1. Choose a Summer-Inspired Color Palette
The quickest way to change the seasonal feel of any die cut is by rethinking your cardstock selection:
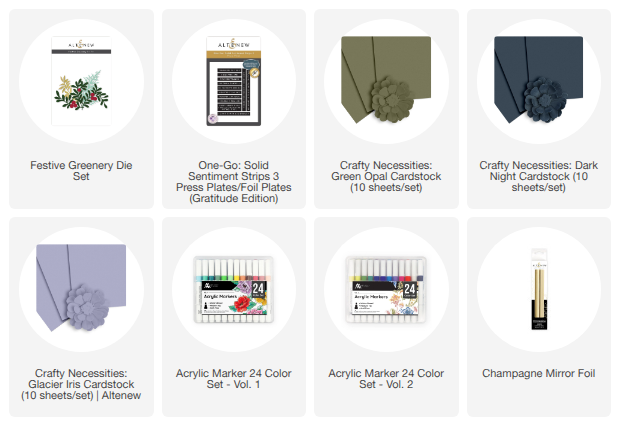
I started by die-cutting the mistletoe branches from Green Opal Cardstock, a soft, fresh green shade that feels lush rather than pine-like.
For the berries, I chose Glacier Iris Cardstock to introduce a rich lavender tone.
Simply swapping out traditional holiday red and forest green for purple and cool green instantly strips away the winter vibe and shifts the design right into bright, sunny summer territory.
2. Add Shading and Highlights with Acrylic Markers
While solid cardstock provides a great base, adding hand-drawn details gives plain die cuts extra depth, realism, and variation. I used paint markers to quickly elevate the flat cardstock:
For the Berries: I used Ultraviolet and Lavender Fields from the Acrylic Marker 24 Color Set – Vol. 1 to add soft shadows and directional lighting to each small berry.
For the Leaves: I added deep shading using Shadow Creek and introduced fine highlights with White from the Acrylic Marker 24 Color Set – Vol. 2.
These tiny details take only a few extra minutes, but they give the foliage a lush, hand-painted look that makes the entire arrangement come alive.
3. Create High Contrast with a Dark Cardstock Panel
When working with vibrant pastel or jewel-toned foliage, choosing the right background is essential for making your design stand out:
For the background panel, I selected Crafty Necessities: Dark Night Cardstock.
The rich, deep navy panel creates a striking contrast against the lighter green foliage and soft purple berries. Instead of blending into a light background, the dark backdrop allows the colors to pop and gives the card a sophisticated, night-garden feel.
4. Finish with an Elegant Foiled Sentiment
To complete the card, I arranged the foliage die cuts neatly in the center, building a layered focal point:
I finished the arrangement with a crisp gold foiled sentiment, created using the One-Go: Solid Sentiment Strips 3 Press Plates/Foil Plates (Gratitude Edition).
The elegant gold hot foiling catches the light beautifully and complements the rich purple and green color palette, providing just the right touch of shine without overwhelming the delicate die-cut foliage.
FAQ: Tips for Stretching Your Supplies
How do I make winter leaf dies look like summer leaves?
Choose lighter or brighter green cardstock (such as lime, mint, or olive) instead of dark pine green. Adding bright berries in pink, purple, or yellow also pulls the die cut into spring or summer.
What supplies work best for adding detail to plain die cuts?
Acrylic markers, distress inks, and colored pencils are ideal for quickly adding gradients, shadows, and highlights to flat cardstock cutouts.

Final Thoughts on Reusing Your Crafting Stash
I hope this card project inspires you to look at your crafting supplies with fresh eyes and discover exciting new possibilities beyond their original packaging!
Sometimes all it takes is a different color palette, a few paint pen accents, and a little extra creativity to transform a seasonal holiday product into a fresh, year-round design. You might be pleasantly surprised by how versatile your absolute favorite die sets can be when you let your imagination lead the way.
Thank you so much for stopping by today! What seasonal dies in your stash will you try repurposing next?
Supply List